TL;DR
Setting Up Authentication
Click Authentication in the sidebar to configure your app's login requirements. There are two sections here.
App Visibility
This controls whether people need to log in before they can use your app. You have two options:
Require Login
Turn this on if you want your entire app to be private. Every visitor will see a login screen and must enter their credentials before they can access anything. This is ideal for internal tools, admin dashboards, or any app meant for a specific group of people.
Some Parts Require Login
Turn this on if you want most of your app to be publicly accessible, but certain features or pages should only be available to logged-in users. For example, a storefront where anyone can browse products but only registered users can place orders or save items to a wishlist.
These two options are mutually exclusive -- enabling one automatically disables the other. If both are off, your app is fully public and anyone with the link can access it.
Registration
Allow Self Signup When this is turned on, visitors can create their own accounts through a signup form on your app. This is useful when you want to let people register on their own, such as for a customer-facing app.
When this is turned off, only you (the admin) can create user accounts manually through the Users panel. This gives you full control over who has access and is better suited for internal or restricted apps.
Adding a new User
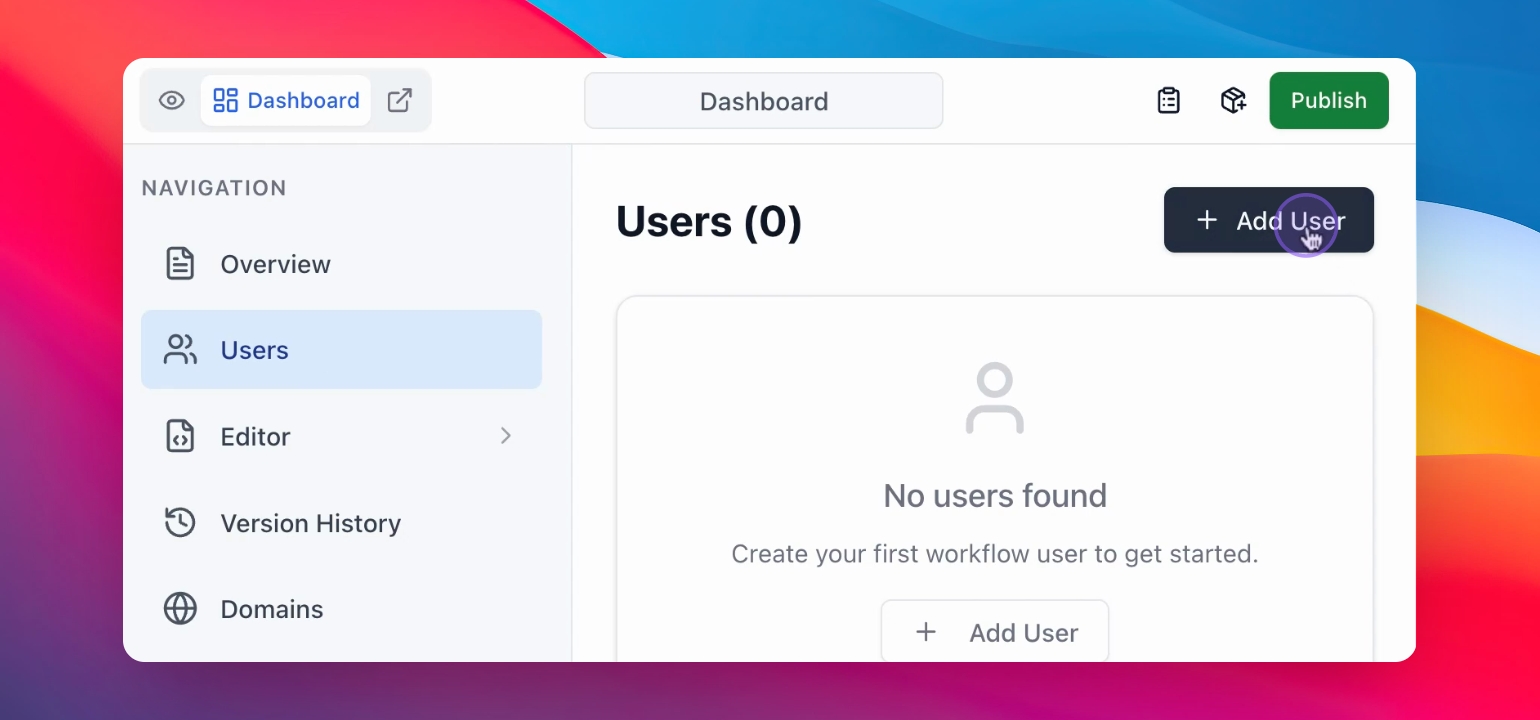
Step 1: Open User Section
Navigate to the User section in your application.
You are now in the User section.
Step 2: Click Add User
Press the Add User button.
You will see a form to input user details.
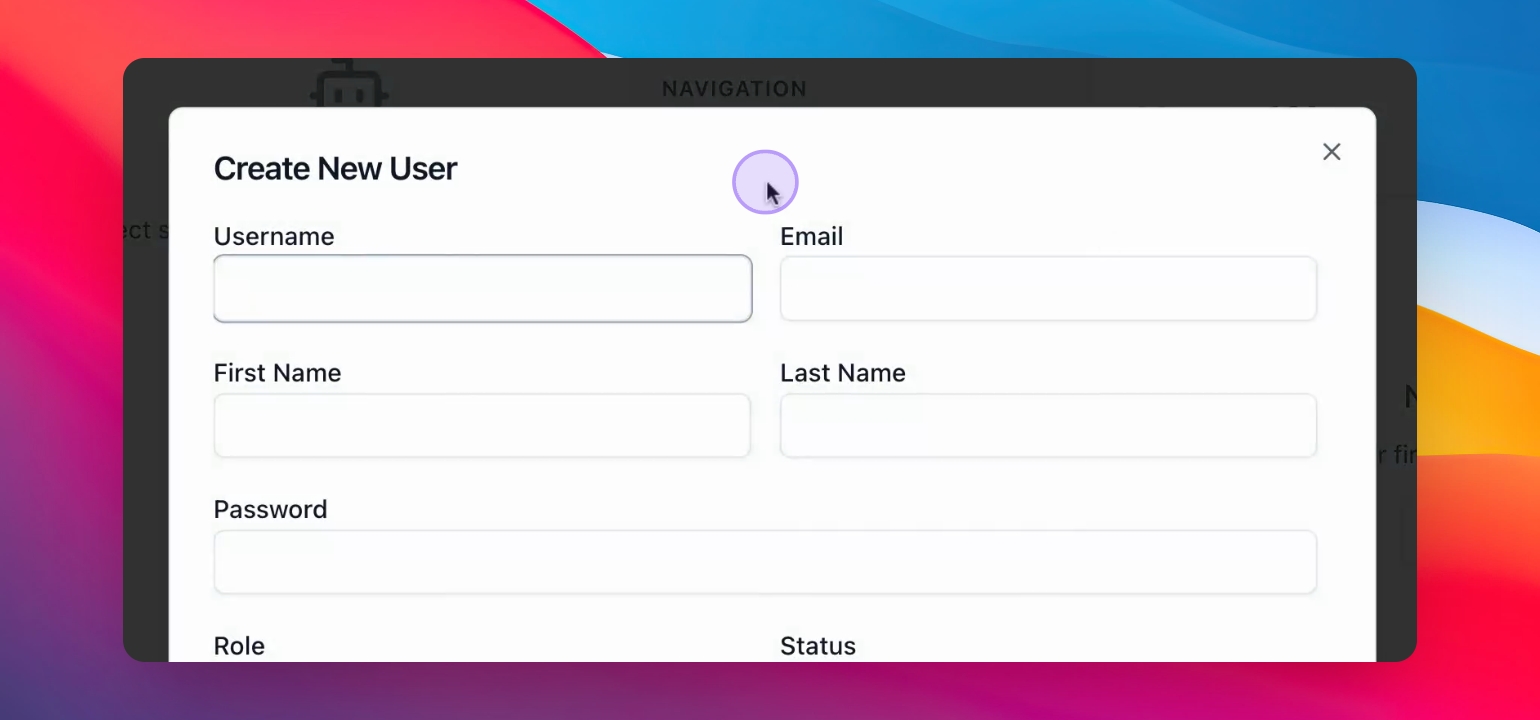
Step 3: Enter User Details
Fill in the user details including username, email, first name, and password.
If your app has custom user fields (for example, department, phone number, or subscription tier), these will appear at the bottom of the form. Fill them in as needed
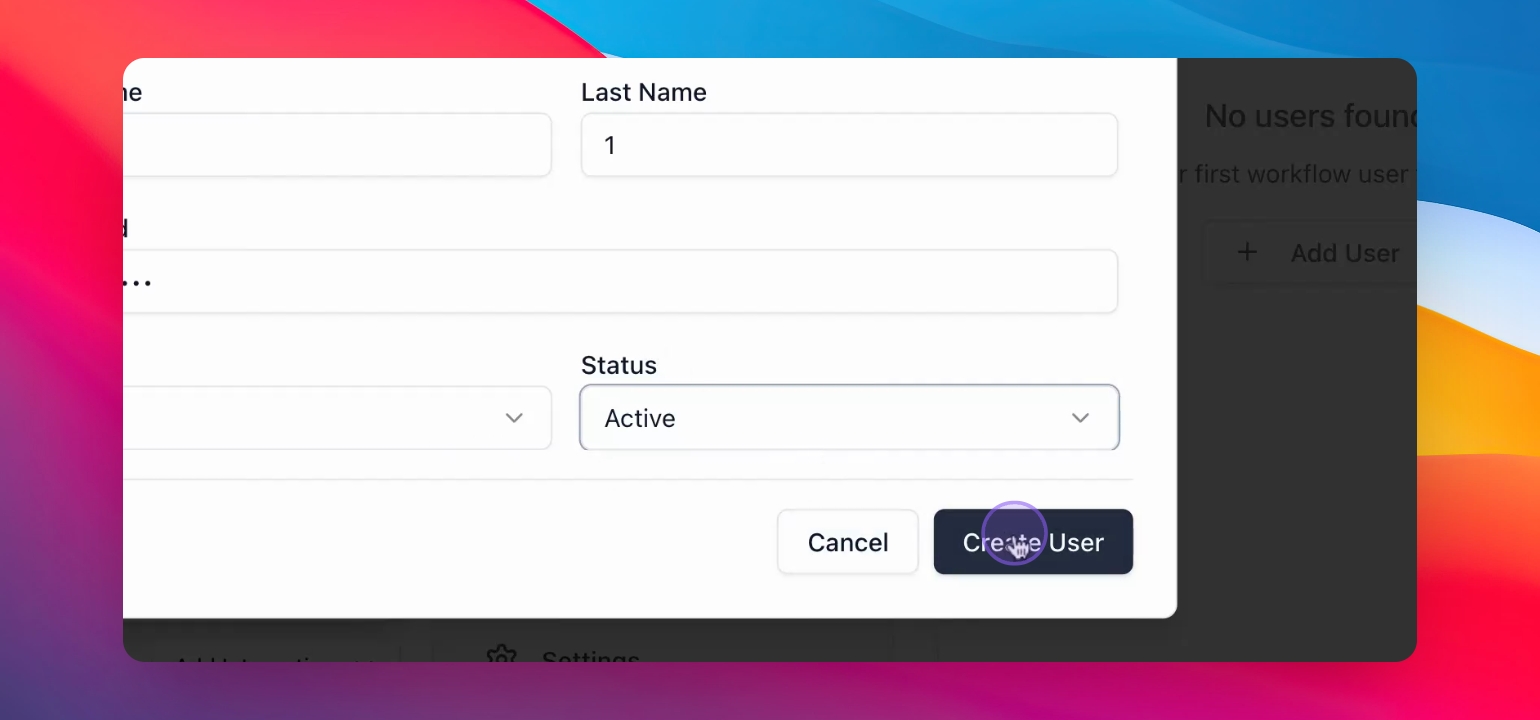
Step 4: Set User Role
Determine the user's role and manage access settings.

Step 5: Create User
Press the Create User button.
Your new user has been created successfully.
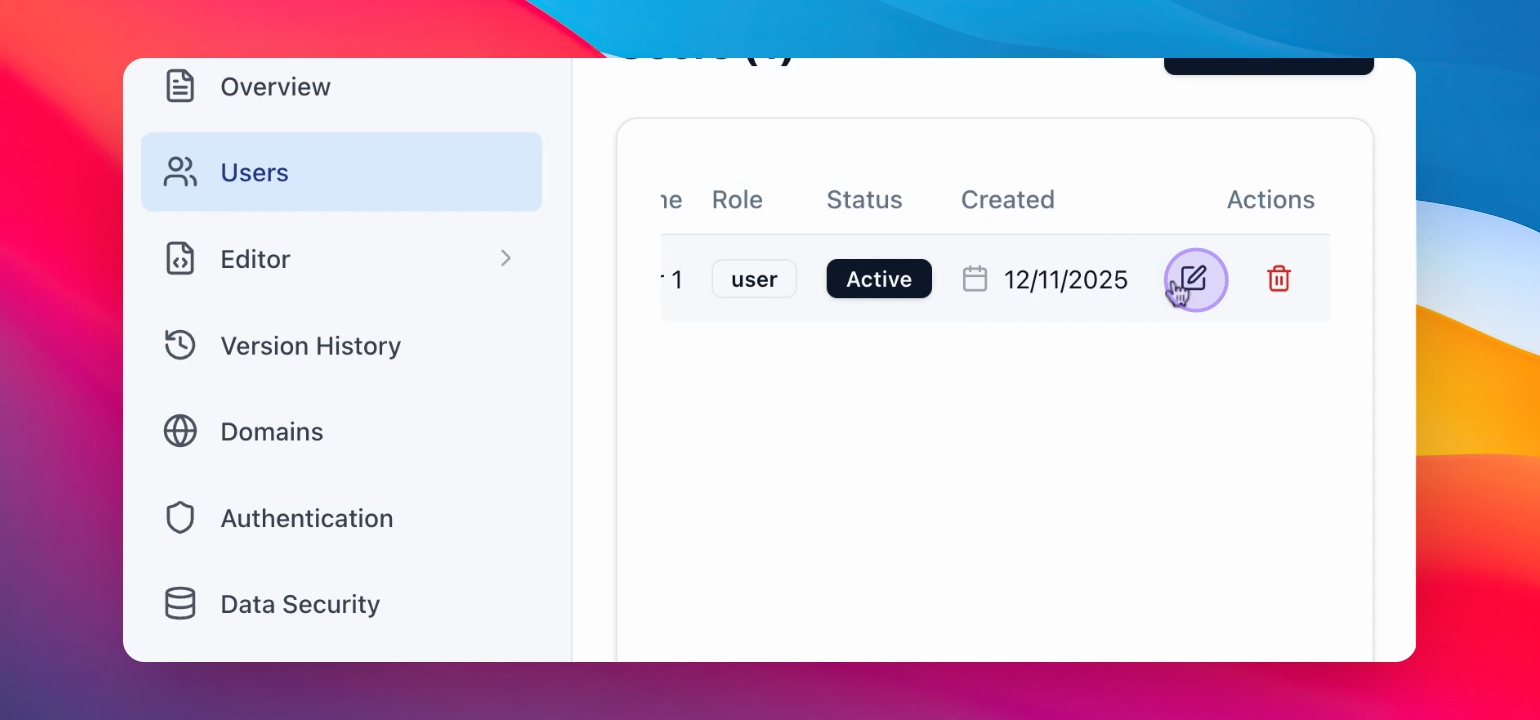
Step 6: Edit User Details
Press the Edit button to modify user details.
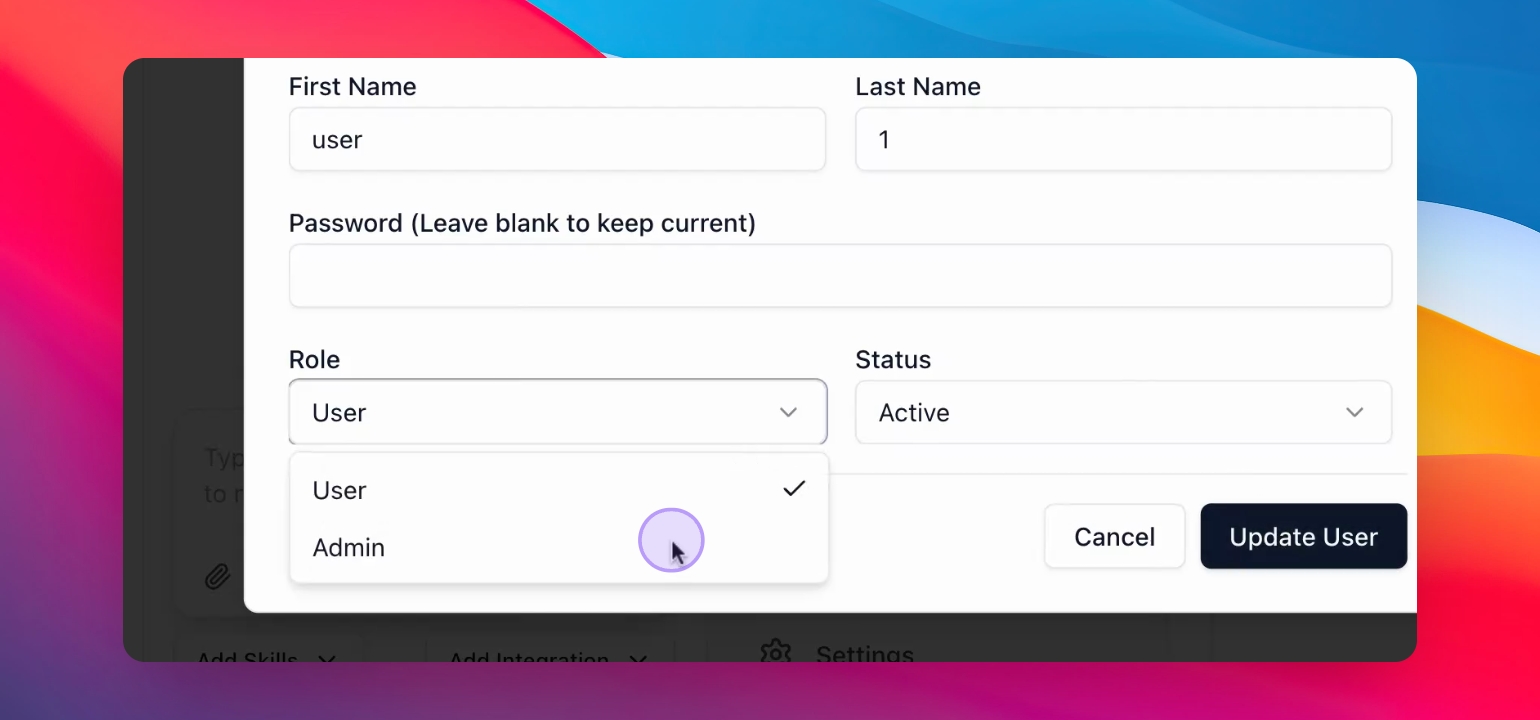
Step 7: Update User Information
Change the department or other details as needed.
Press Update user to save changes.
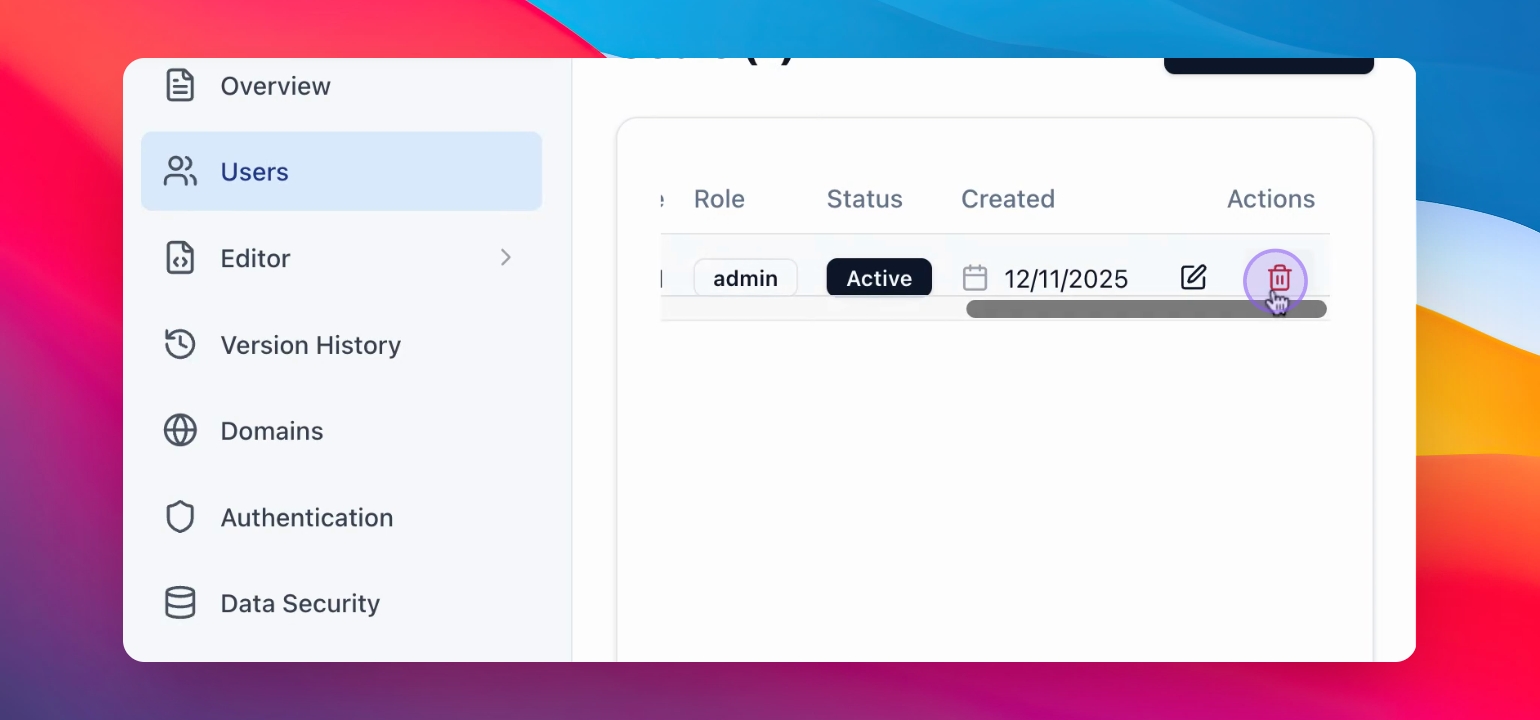
Step 8: Delete User
If necessary, delete the user from your application.